
 Greetings dear friends,
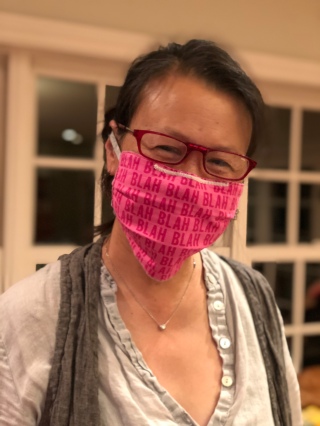
It’s been a long time since I posted here (5 years)! But today I’m posting a tutorial for a face mask to sew. At this moment, we are in a shelter-in-place situation, trying to keep ourselves and others safe from COVID-19. COVID-19 is disease caused by a novel virus, which means we don’t have immunity to it from previous exposure. Anyway, enough about that. You can read about it lots of places – this paragraph is to give context for folks dropping in from another galaxy or readers from the future when we’ve solved all these problems.
These masks should be easy to make by design. There are harder tutorials out there that have more shaping, but those need more fitting as well. My goal was a tutorial that makes an effective mask relatively quickly with readily available materials.
These not as effective at blocking coronavirus particles as professionally-produced N95 masks. And they’re not a solution for the lack of personal protective equipment our healthcare providers will need in the next few weeks and months.
But! Home-made face masks are better than nothing, our doctor and nurse friends are telling us, and right now many of them have nothing, so: here is a pattern/tutorial for face masks you can make out of what you have.
For clarity and for speed, here’s the information we’ve distilled from medical professionals, published research, a doctor friend who tried these on for us, and other online research. Fuller citations are all at the bottom of the tutorial:
- Homemade cloth masks are not a substitute for real protective equipment that hospitals and others desperately need, but they are SOMETHING in place of nothing (CDC). They could also be useful for patients and/or regular folks going around in the world. Again, not as good as real manufactured masks, but if they’re clean, they’re better than going without.
- Tightly-woven cotton is the best material to use for the face covering. 2 layers are better than 1. Use NEW, clean fabric.
- Elastic can cause allergies and doesn’t wash/withstand heat as well as cotton, so we have opted for fabric or ribbon ties rather than elastic bands.
- Pleats help shape masks to a face, but professionally produced masks also use an aluminum strip to shape a mask around the nose. We are using pipe cleaners to shape and seal a mask on a person’s face. We’ve not tested twist ties but they might also be a good option.
Tips for being helpful:
- Look for and donate to local organizations that could use your masks right now, if you can make a bunch. This site has a large and growing database of hospitals, shelters, and even grocery supply workers who are asking for masks.
- Wash any masks you send to organizations before you send them out. Hopefully hospitals and other healthcare providers will sanitize them as well but there are no guarantees. Warm water wash with detergent.
- Avoid the koala mitten syndrome: keep an eye out for a hopeful future boost in real N95 production that will make your homemade masks unnecessary, and don’t flood organizations that don’t need your products.
- Use what you’ve got. Don’t make yourself frantic. Do it with love. Be safe.
TUTORIAL:
STEP 0:
Wash your hands, your work surface, and your tools thoroughly (The parts that you touch anyway).
STEP 1:
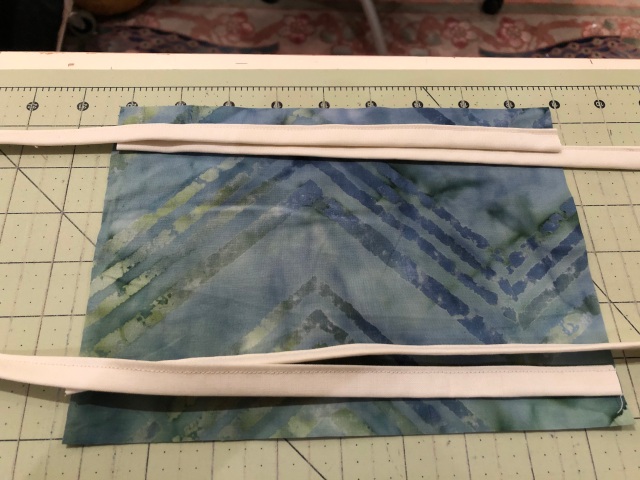
Cut two 9” x 6.5” rectangles of tightly-woven cotton fabric. I am using high quality woven quilting fabric. Cut two straps* 25” in length and two straps 12” in length. (Err on the high side for these, if you’re going to err.)

STEP 2:
Layer the fabric with the right sides (the patterned sides) together. If there’s a direction to the fabric (if it has words, for example) take note.
The straps will go in between your right-side-together fabric rectangles. The photo below shows just the bottom rectangle, so you can see the strap placement. Longer straps should go on the short sides of the rectangles near the “upper side” of the mask (which will be up toward the eyes) and the shorter straps will go on the “lower side” (toward the chin/neck).
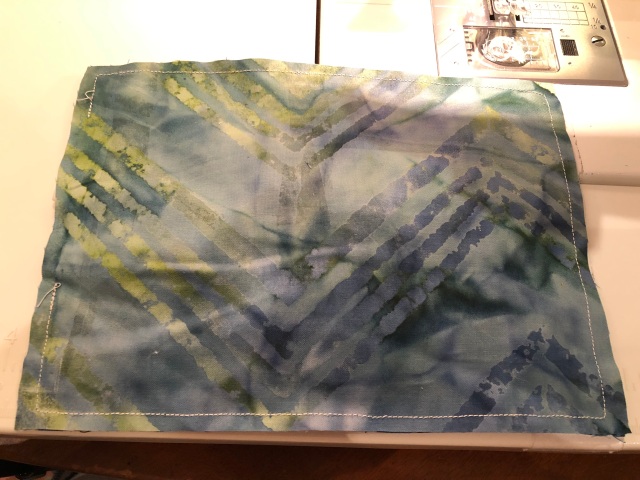
Beginning below the strap on one short side of your rectangles, stitch a ¼” seam up over that strap, across the long side, down the other short side, and then up over the second strap. Do not close the rectangles — you must leave 2” or so to turn your mask right-side out. Make sure the straps are properly sewn to the mask but that one end of each strap remains free. (The strap lengths should now be inside your inside-out rectangles.)
STEP 3:
Clip the corners of your rectangles. Turn your rectangles so they are right-sides out. Press them flat so the seams are inside, including the open area where you turned your mask.
STEP 4:
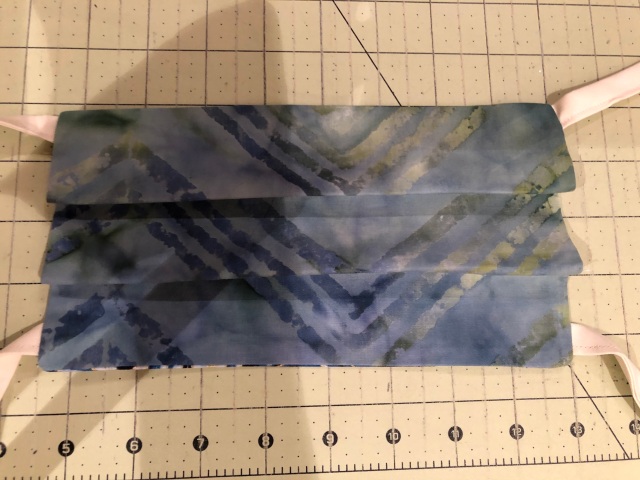
Press in two ½” pleats, about evenly spaced. (Pleats should fold down, toward the chin.)
Topstitch a ⅛” seam around your rectangles, stitching down both the pleats and the opening you left to turn your rectangles as you do so. Check to make sure you caught the edges of the opening.
This is where you stop, if you don’t have pipe cleaners or twist ties or some other wire shaper to add as a nose piece. Wash your mask and send it where they’re needed (or wear it yourself)!
STEP 5:
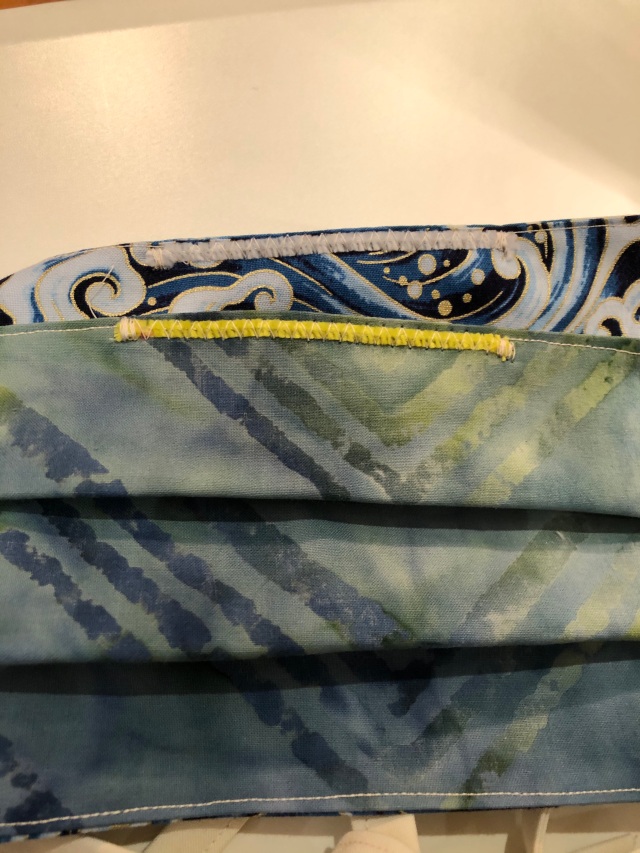
Clip a 4” segment of clean, new pipe cleaner. Turn the sharp ends in with pliers. On the outside of your mask, zig-zag stitch the length of pipe cleaner near the upper edge of the mask to secure it.
Now, wash your mask and send it where it’s needed (or wear it yourself)!
*A NOTE ON STRAPS: We used grosgrain ribbon for a few prototypes but they did not hold up well in the wash. Twill tape would be ideal. In lieu of better options, we made fabric tape of our own. A short tutorial is included here, in case you need it. Be resourceful, don’t use anything meltable or easily frayed, make sure your work can be sterilized/sanitized.
STEP 1.1
Cut 2-inch strips of tightly-woven cotton fabric (join together to make longer lengths as needed).
STEP 1.2
EITHER: use a binding strip tool to fold your fabric OR: fold the sides of your fabric in by hand ½” to meet in the middle. Press flat.
STEP 1.3
Press in half, so the raw edges are inside.
STEP 1.4
Sew a ⅛”from the open side to secure your fabric tape/sturdy cotton ribbon.
SOURCES:
This blog post concerns a peer-reviewed study on homemade cloth face masks as a stopgap measure for viral pandemics, and breaks it down for public consumption.
https://smartairfilters.com/en/blog/best-materials-make-diy-face-mask-virus/
Here’s the study they referred to, if you’d like to read the whole thing yourself.
https://www.researchgate.net/publication/258525804_Testing_the_Efficacy_of_Homemade_Masks_Would_They_Protect_in_an_Influenza_Pandemic (you can download the full PDF from that site)
From the CDC (https://www.cdc.gov/coronavirus/2019-ncov/hcp/ppe-strategy/face-masks.html): In settings where facemasks are not available, HCP might use homemade masks (e.g., bandana, scarf) for care of patients with COVID-19 as a last resort. However, homemade masks are not considered PPE, since their capability to protect HCP is unknown. Caution should be exercised when considering this option. Homemade masks should ideally be used in combination with a face shield that covers the entire front (that extends to the chin or below) and sides of the face.


Thank you for doing this. I ordered my cotton and bias tape ties today along with pipe cleaners. I will start making these as soon as I get the materials!
Pingback: How to use a Face Mask | piecedgoods